|
|
|
|
#1 |
|
Member
Join Date: Feb 2011
Location: Virginia Beach, VA.
Posts: 79
|
Stock Exhaust Lowering
Well this isn't going to be something huge and difficult but still a nice to know if anyone else wants to do it.
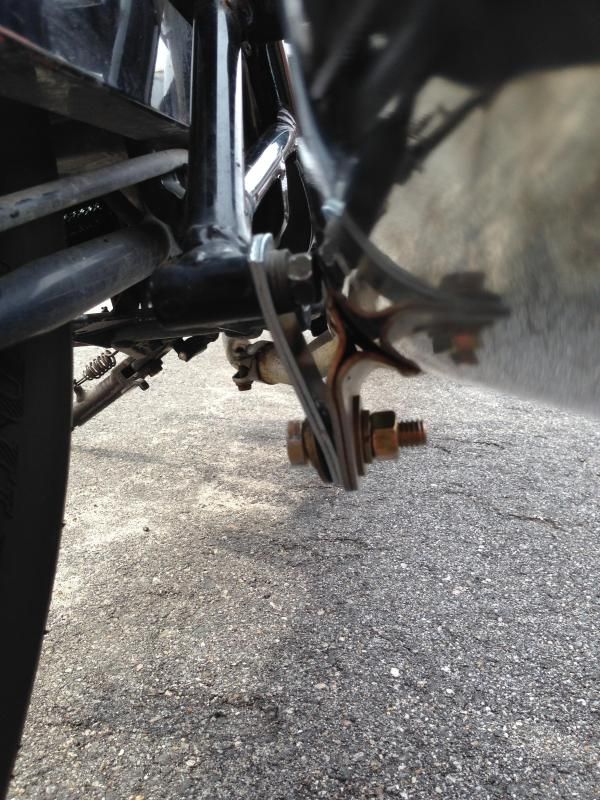
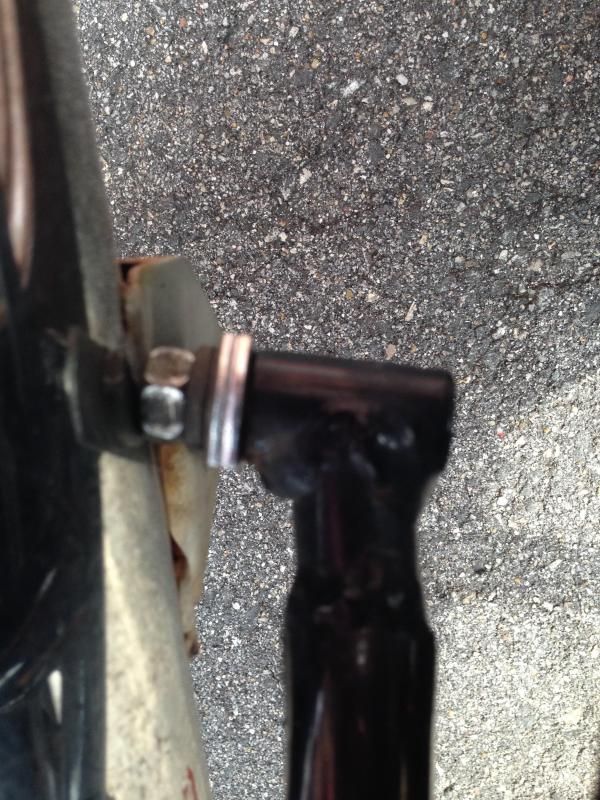
All in all what I did was simply get some basic parts from Tractor Supply and was able to lower my stock exhaust 1 1/2 inches. I have done this in preparation for the Hard saddle bags and trunk I have ordered and will be getting next week. I also plan on doing photos of the install of those too. Down to business. 1. Stock Exhaust  2. Parts I used from Tractor Supply *All grade 8 *3/8" x 1.5" *brackets are cross pieces used for U bolts *2 lock washers, 2 washers, nut *9/16" wrench  3. Install completed (pretty simple) I just put two of the cross pieces together for more sturdiness, on top I ran the stock bolt through and put back on bike, the bottom bolt I have into the exhaust bracket.  4. It wasn't easy to get the exhaust pushed down to where I wanted it, I didn't loosen anything, I just pushed "REALLY HARD" until it was lined up with the lower bolt and then put the nut on and tightened it.  To what I see it appears to be about 1 1/2" lower than before. For me I feel that is a LOT. Currently my only issue is the stock bolt is now pushing against the side of the exhaust  I hope this doesn't cause any problems, but I can see it happening so I am going to see if I can figure something out to space it out some here. Hope this is beneficial to others, this is all I am really doing to prep my bike for the saddle bags and trunk I ordered. However I do plan on doing a write up on them as well, even if it turns out they wont work on the bike. I will still do a write up for future reference. Login or Register to Remove Ads |
|
|

|
|
|
#2 |
|
Senior Member
Join Date: Dec 2006
Location: Squamish B.C Canada
Posts: 11,409
|
I wonder if you have added some stress to the exhaust flange and engine. You may have created a potential problem.
A second thought for you. Not a biggy but a future little problem. You used SAE fasteners etc. I always used Metric hardware to keep the bike entirely Metric for future servicing and maintenance issues. If the SAE stuff comes loose while on the road somewhere you will be banging the side of your head with a wrench. Looking forward to your luggage thread. |
|
|

|
|
|
#3 | |
|
Member
Join Date: Feb 2011
Location: Virginia Beach, VA.
Posts: 79
|
Quote:
Login or Register to Remove Ads |
|
|
|

|
|
|
#4 |
|
Senior Member
Join Date: Dec 2006
Location: Squamish B.C Canada
Posts: 11,409
|
|
|
|

|
|
|
#5 | |
|
Super Moderator
Join Date: Jan 2007
Location: Dalton, GA
Posts: 3,996
|
Quote:
I've never heard of this before... Start the process of correcting this. Login or Register to Remove Ads |
|
|
|

|
|
|
#6 |
|
Member
Join Date: Feb 2011
Location: Virginia Beach, VA.
Posts: 79
|
So after worrying about putting to much stress on my flanges, I decided to see what I could do to reduce the stress and maybe make this better. Lol well there must be all kinds of crap half assed on my bike and my tinkering is making them better. So yeah my seal is now damn near perfect, when I took the lowering part off they went way off. I took the bike to a local shop and asked what I should do (I took it in with stock setup) and they said the pipes have been bent and won't stay lined up like this. Lol so it seems the folks I got this from didn't take very good care of it (not surprised since it had dry rotted tires on it, and wouldn't start when I took ownership). So for me doing this little project has improved the seal and I have seen a noticeable improvement on how she rides too.
Mark this one up to good fortune. 
|
|
|

|
 |
|
|